Custom Search
|
|
 
|
||
|
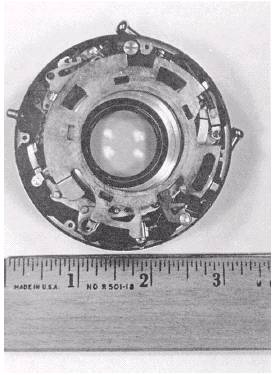
It is a simple matter to eliminate or block out an unwanted background in product photography. The technique involves two negatives. Two separate pictures are made of the product setup. One exposure on continuous-tone film is made of the product lighted normally. A second exposure, on high contrast line-copy film, is made of the object silhouetted against a well-lit white background. The two negatives are then sandwiched together and printed. The setup for this procedure is much the same as for a straight product picture. The lighting, however, is a little different. Figure 6-17 shows a typical setup for this two negative technique. The procedure is as follows: 1. Support the product so it cannot move between the two exposures. Use a small support because it must be opaqued out of your line copy or background negative. A light table may make a good support, but when some other support is used, keep it far enough from the background so the background can be lighted separately. 2. Light the product to provide maximum detail. Do not worry about objectional shadows on the back-ground or visually separating the product from the background. In fact, with this technique, lighting that separates the subject from the background may cause a loss of detail at the edges of the subject. 3. Use a white paper background that is large enough to fill the camera view. The background illumination must be very even because the high-contrast film used to make the background negative has a short exposure latitude. 4. Use continuous-tone film to make the subject negative. Use Kodalith Ortho film to make the back-ground negative. 5. It does not matter what exposure you make first. However, each exposure must be treated separately. Only the lights for the exposure being made should be turned on. 6. Because lenses can shift focus at various f/stops, the same f/stop must be used for both exposures and the camera must be rock steady-it cannot move between exposures. 7. Load one film holder-one side with continuous-tone film and one side with high-contrast film. 8. Make the exposures. When you are making the background exposure, be certain there are no specular reflections bouncing off the background onto the subject, and use only the background lights. When making the subject exposure, use only the subject lights. 9. Process continuous-tone film and line-copy film as recommended in the Photo-Lab Index. When you include a ruler (fig. 6-18) in the scene in product photography, especially for damage reports or forensic purposes, it indicates exact scale and simplifies printing the photograph to exact size.
PH3 Yvonne Albritton Figure 6-18. Ruler included in product photograph. |
 |
|
|
||