Custom Search
|
|
 
|
||
|
Product photography requires patience and a keen eye. The slightest change in lighting or subject placement can add to or subtract dramatically from your photograph. Pay particular attention to small details of your photograph because this helps to provide sharp, high-quality images with fine detail.
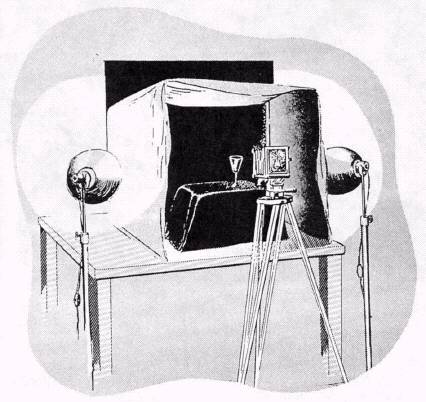
Figure 6-12. Tent lighting setup. TENTING Photographing small products can be quite difficult if they include bright reflective surfaces. You can easily see other nearby objects reflected in them and sometimes even the whole studio. Also, light from the lighting units may reflect off the surface very strongly at a particular point. This can create an unwanted bright highlight. There are two ways to get around these problems. You could use many lights and add reflectors to make sure the lighting is even. This may solve the problem of light from the lighting units reflecting off the subject surface, but unfortunately there are two great disadvantages: it requires more lights than most photo labs have, and you still have reflections. The other way to solve the problem is to use the tenting technique. The tent consists of a frame covered by a translucent white material that casts a diffused illumination on the subject (fig. 6-12). The lights are placed outside the tent and directed onto the translucent material. The color of the background, which is placed inside the tent with the subject, depends on the subject and the effect desired. Strips of black or colored paper taped to the inside of the tent add the necessary dark accents or bring to life a colorless object. |
 |
|
|
||