Custom Search
|
|
 
|
||
|
Another way to control reflections is to use a matte spray or dulling compound. Matte spray comes in a pressurized can and is useful for the high gloss of highlights on shiny, metal objects with curved surfaces. When used, the spray should be applied to the entire surface of the object. However, do not indiscriminately spray all types of surfaces. The spray may damage some finishes or plastics. When used on metal objects, it can easily be wiped off after the picture is made. Matte spray can also be applied to the back of a glass of clear liquid to cause the backlighting to spread more evenly over the back surface. Cosmetic eyeliner, applied with a soft makeup or camel-hair brush, can also be used to help control reflections.
Figure 6-13. Using a mirror to show both front and back of the subject in one photograph. USING A MIRROR It is often difficult to set up a camera for interior and closeup work to obtain the most desirable viewpoint. Space limitations or pieces of equipment may obstruct the view and make it impossible to photograph an assembly directly. Frequently, a mirror can be used to your advantage in product photography. A mirror placed at the proper angle and distance shows the opposite side of an object in the reflection, while the camera records the front side directly (fig. 6-13). For example, in photographing an object for damage assessment where the damage is on two or more surfaces, you may find it difficult or impossible to show all the damage in one view without the aid of a mirror. In such cases, the value of a picture may be greatly increased by showing all of the damage in one picture. One instance would be in photographing a cylinder that has been scored or cracked on the inside as well as damaged outside. Both surfaces may be shown in one view by using a mirror. You may often find it desirable to obtain a picture of an object or part that shows its relation to the complete assembly. When it is impossible to position the camera and see the part or object directly, the problem may be solved by using a mirror to reflect the image of an assembled part. Taking a picture of a reflected image presents some problems that are unique to mirror photography. It is difficult to prevent the mirror from reflecting other objects that are not wanted in the picture. You must be careful and place the mirror at the proper angle to eliminate unwanted reflections. When arranging the
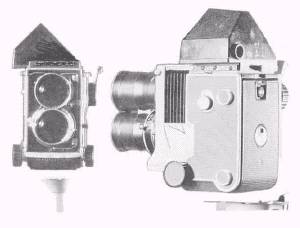
Figure 6-14. Exploded views. lights, avoid illuminating an object that produces undesirable reflections. Often a screen can be set up to block the reflection of unwanted objects. Correct lighting of an object for mirror photography is slightly more difficult. Lighting on both the front and back sides of the object must be evenly balanced; otherwise, the mirrored image appears too dark or too light. Direct the light on the object from the mirror side as well as the camera side. When it is impossible to place a light on the mirror side of the object, use the mirror to reflect the light onto the back side of the object. This requires careful placement of the camera in relation to the light source to avoid strong rays of light from entering the lens. Spotlights are usually more suitable than floodlights as sources of illumination, because a beam of light is easier to control. Focus the camera carefully when photographing a reflected image. Usually, it is necessary to use a small f/stop to increase the depth of field sufficiently. When focusing on a reflected image, the lens must be set for the distance from camera to mirror PLUS the distance from subject to mirror. This naturally requires a much greater depth of field than is ordinarily required. |
 |
|
|
||