Custom Search
|
|
 
|
||
|
Burning-in makes an area within a print darker than it would be otherwise. A burning-in tool is usually a piece of cardboard with a hole in the center that is
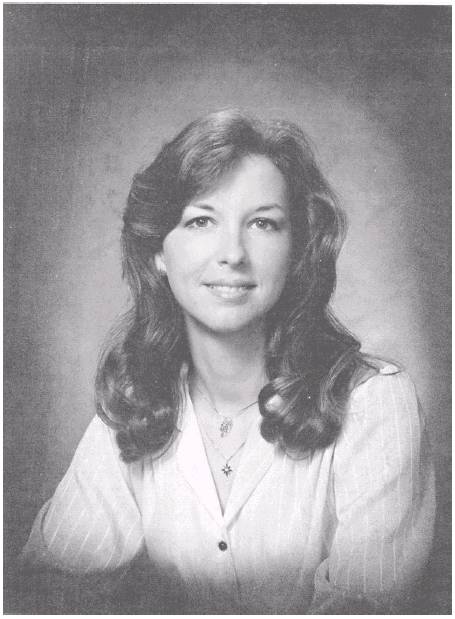
PH1 Anthony Contos 303.63.2 Figure 11-15. Vignetted head-and-shoulders portrait. smaller but approximately the same shape as the area to be burned in. Your hands can be shaped to form a hole to allow light to pass. A burning-in tool is positioned between the enlarger lens and the printing paper, so light passes through the hole and exposes only that part of the paper you want to print darker. The rest of the image is blocked by either the tool or your hand. For burning in, the usual procedure is to give the printing paper the overall required exposure during which time any required dodging is performed. Then re-expose the area to be darkened.
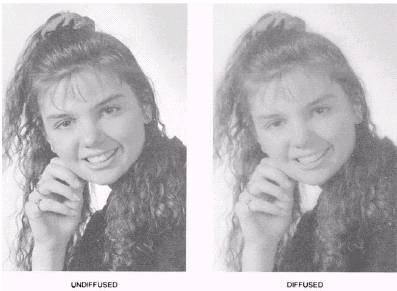
PHC Carl Hinkle 302.309 Figure 11-16. Head-and-shoulders portrait using diffusing techniques. Some areas of a negative that may require burning in are the dense areas that would otherwise reproduce as pure white with little or no detail or very light gray in the print; for example, a bright sky, a white uniform, a white cake, or highlights on a face. Like dodging, to prevent an outline of the tool from reproducing, you should keep the tool in constant motion during the burning-in exposure. |
 |
|
|
||