| Tweet |

Custom Search
|
|
 
|
||
|
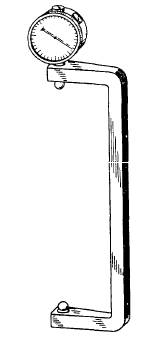
INSTALLING JOURNAL BEARINGS Always check the markings of the lower and upper bearing halves so you install them correctly. Many bearings are interchangeable when new, but once they have become worn to tit a particular journal they must be reinstalled on that particular journal. You must mark or stamp each bearing half with its location (cylinder number) and the bearing position (upper or lower) to prevent incorrect installation. You must also pull the connecting rod bearing cap nuts down evenly on the connecting rod bolts to prevent possible distortion of the lower bearing cap and consequent damage to the bearing shells, cap, and bolts. Use a torque wrench (fig. 3-30) to measure the torque applied to each bolt and nut assembly. Apply the same torque to each bolt. If a manufacturer recommends the use of a torque wrench, the specified torque will be listed in the manufacturers technical manual. Another method for pulling down the nuts evenly is to stretch each bolt an equal amount and measure the distance from end to end of the bolt before and after tightening. Figure 3-31 shows the type of gauge used,
Figure 3-31.Gauge used for measuring bolt elongation.
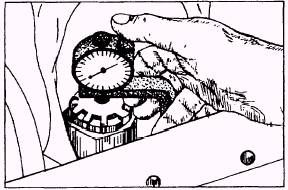
Figure 3-32.Measuring bolt elongation. and figure 3-32 illustrates the gauge in use. The proper elongation is listed in the engine manufacturers technical manual. After you reassemble a bearing, always bar or jack over the engine by hand through several revolutions. Check to see that all reciprocating and rotating parts function freely and that the main and connecting rod bearings do not bind on the crankshaft. Turn larger diesel engines over first by the manual jacking gear provided and then by the engine starting system.
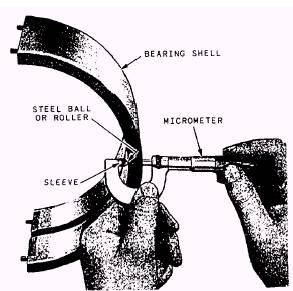
Figure 3-33.Measuring bearing shell thickness.
Figure 3-34.Checking bearing clearance with a Plastlgage. |
||
|
||