Custom Search
|
|
 
|
||
|
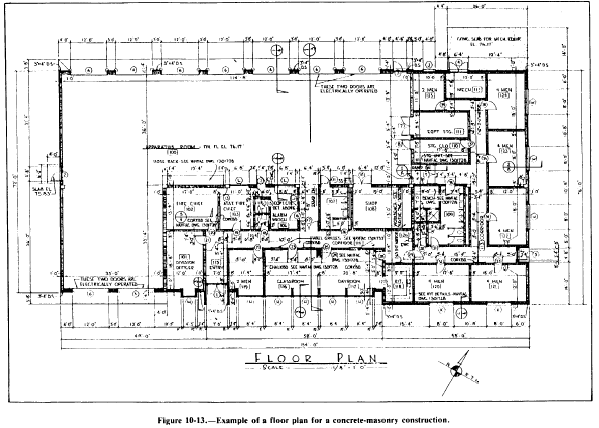
DRAWING A FLOOR PLAN.
Proper scale selection and
sheet layout should be done to
achieve the best results on the drawing. Before
doing the actual drawing, you should draw up
preliminary sketches to include the approximate
size of the building, room dimensions, wall
thicknesses, corridor widths, and so forth. Ideally,
a scale of 1/4 in. = 1 ft should be used for easy readability. Smaller scales, such as 3/16 in. = 1 ft and 1/8 in. = 1 ft, are sometimes used for large buildings and in cases in which the size of the sheet is limited. After you have selected the proper scale and sheet layout, you should follow the procedures outlined below.1. Lay out construction lines (after taping the sheet to the drafting board surface) for borders, title block, and exterior limits of the building at any one side. Lay out the rooms and walls from left to right, with the exterior wall thickness being drawn first. Since the wall thickness varies with the materials used, it is impossible to accurately draw actual dimensions of each material selected. An EA would use a "nominal" wall thickness dimension of 6 in. for a wall frame exterior wall that has no brick or stone veneer. In a wall, a VENEER is a thin covering of material, such as brick, placed over a backing material of wood frame or block. Nominal wall thicknesses found in the checking rooms, closets, bathrooms, corridors, and so on, as you proceed. Notice that a wider wall is required to allow room for a plumbing pipe to be contained within the wall.
2. Locate all doors. Both exterior and interior doors can be drawn easily if you use an architectural template. Notice that exterior doors in residential houses generally swing inward, whereas those of commercial buildings are often required by building or fire codes to swing outward. Some people prefer a full or 90-degree door swing over the 30-degree swing because they can check to be certain that it will not interfere with any equipment, walls, or appurtenances in the room.3. Draw in and locate all windows, using proper window symbols and conventions. Next, draw the stairs (and handrails, if any) and other exterior and interior features, fixtures, equipments, appliances, and cabinets, using their proper symbols.4. Lay out the guidelines for dimensions and the dimension lines. Now that the building basic floor plan is lightly laid out, double-check and review the accuracy and completeness of the information drawn in. You are now ready to darken in the plan. Remember that, other than the construction lines (which need not be erased), all of the lines must be drawn darkly and will vary only in the width of their lines. As an EA, you must develop a systematic approach in pursuing a fast and orderly darkening of lines. Darkening from left to right and then from top to bottom is common practice. To help keep the drawings clean, EAs often cover a partial section of their finished drawing with a clean sheet of paper while darkening the exposed section.5. Draw in section markings on the floor plan and indicate where the wall sections have been taken. If at this point neither the section nor detail markings have been decided upon, they may be placed on the plan later. Complete the drawing by adding all the material symbols, title, graphic scale, and other relative information. Go over your floor-plan checklist for completeness. One of your challenges as an EA (and a measure of drafting competency) is to apply your dimensioning technique to the various types of materials and construction methods used on the building. Although the principles of dimensioning and general locations of dimensions are the same, a difference exists in which dimensions are shown, and how the walls, openings, and partitions are dimensioned. |
 
|
|
|
||