Custom Search
|
|
 
|
||
|
LEARNING OBJECTIVE: Recognize the purpose of contact printing, identify the required contact printing equipment, and determine the procedure used in contact printing.
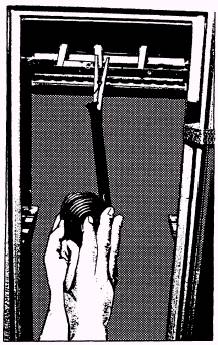
Figure 11-30. - Drying film in a drying cabinet In Photography, printing is the term used to describe the process of making positive images from negatives (and, in some instances, from film positives). The most familiar example is the print made on a paper base. A photographic print is made by passing light through the negative onto a piece of paper that is coated with a light-sensitive emulsion very similar to film. A contact print is produced by exposing a sheet of photographic printing paper through a negative with the paper emulsion and the emulsion side of the negative in contact with each other. Light is directed through the negative that controls the amount of light transmitted to the paper. The dense areas of the negative pass less light than do the more clear or less dense areas. The image densities formed (after development) in the emulsion of the paper make a positive print that represents the tonal values of the original subject. Furthermore, since the paper is in direct contact with the negative, the print produced is exactly the same image size as the negative. Contact printing is the quickest, simplest, and most economical method of producing photographic prints. For making proof prints and small volume printing, all you need for a "contact printer" is a sheet of glass, a light source, and some sort of padding. For making contact proof prints and the occasional contact print job, a glass and a supporting pad are all that are necessary. "Contact printers," consisting of a sheet of glass hinged to a metal frame and a pad assembly, are generally known as proof printers. If such a device is not available or is not large enough for the negatives to be contact printed, a piece of 1/4-inch plate glass and a soft padding (such as a rubber typewriter pad) can be used. Quarter-inch plate glass is heavy enough to keep the negatives and paper flat and in contact during exposure. The glass must be free of flaws, scratches, bubbles and dirt. CONTACT PRINTING PROCEDURE Check the lamp to be sure it is operating properly. Rinse the trays with fresh water, and prepare the developer, stop bath and fixing solutions. The trays should be larger than the prints to be produced, and one of the largest or deepest trays available should be used for the fixing bath. When the solutions are ready, rinse and dry your hands. A supply of printing paper should be available and conveniently near the printer. Place an empty paper box or paper safe near the printer if the prints are not to be processed after each is exposed. Hold the paper in these until the paper is ready to be processed. If the paper is not stored in a paper box or paper safe, it will fog eventually, even under safelight conditions. Examining the Negative The first requirement in making a good print is a clean negative. The negative must then be examined to determine the contrast (flat, normal or contrasty) and the approximate exposure time required to produce a quality print. As a novice darkroom worker, you may not be able to make these determinations accurately. However, in a short time, and with a little experience, you will not have any trouble. Selecting a Printing Filter Your imaging facility should have a contrast printing filter kit consisting of seven filters in half-step increments from one to four. The number two filter is normal contrast; any filter lower than two decreases the contrast. A filter higher than two increases contrast. In analyzing a negative to determine the most suitable printing filter, be careful not to confuse contrast with density. When in doubt, it is best to make test prints. If the test print is contrasty, another test print should be made with a lower numbered filter that will lower the contrast. If the original test print does not have enough contrast, change to a filter with a higher number to increase the contrast. The printing exposure is the operation most likely to cause you trouble. Unlike most films that can tolerate some overexposure and underexposure and still yield usable photographs, printing papers must be exposed correctly to produce good prints. Experience and familiarity with printing equipment does help, but for the beginner, the correct exposure for prints from most negatives is best determinedly making test prints. The density of a negative is a variable you must consider. Negative density can be determined by making a few test exposures. The exposure time for a negative of average density may be about one to three seconds. If the negative is large, avoid the expensive and wasteful temptation of using a whole sheet of paper. Instead, use a strip about 2 inches wide and as long as the negative for the test exposure. For example, an 8- x 10-inch sheet of paper can be cut into three or four small strips. After you have determined the filter and the test exposure time, set the timer for the estimated test exposure time. Place the paper test strip over the negative in the printing position. Place the test strip on the negative so the test exposure includes some highlights, midtones and shadow areas. Hold the paper in position with one hand and lower the platen into the printing position. As soon as the platen grips the edge of the paper, move your hand out of the way. When the platen is fully lowered, turn on the printing lights for the test exposure time. When the test strip has been exposed, develop it for the recommended time. If the image is too dark the exposure was too long. If the image is too light, the exposure was too short. It is difficult for even an experienced photographer to judge the contrast of a print that has been under- or overexposed. If the test print is too light or too dark the exposure should be changed until the proper density is reached with normal development before you attempt to judge the contrast of the print. A normally exposed print develops gradually, but steadily - shadows first, then midtones, and finally highlights. The image should appear in about 30 seconds, providing that the developer is at the proper strength and temperature. If the image develops very quickly with a general mottling, it was overexposed and the next test should be given less exposure. When you have produced a satisfactory test print, you can make your production prints from that negative. If you use a printing frame (glass and pad or proof printer) to make contact prints, the most convenient and economical way to determine exposure and connect contrast is to expose the test strip in progressive steps of, for example, two, four, six and eight seconds. This is done by holding an opaque card on top of the glass and covering three quarters of the paper and exposing one-quarter of the paper for two seconds. The card is then moved to cover one-half of the paper and giving it an additional exposure of two seconds. Move the card so it rovers one-quarter of the paper and give it another two seconds of exposure. Finally, remove the card and give the entire sheet one last exposure of two seconds. This will show a distinct progression of exposures of two, four, six and eight seconds (fig. 11-31). Develop the test strip normally and determine the correct exposure by visual examination in white light. If the correct exposure appears to be between two steps, the required exposure can usually be estimated with some accuracy. However, further test prints maybe needed. Exposing and Processing Prints When a test print develops in the recommended time, rinse it in the stop bath, immerse it in the fixing bath for about 30 seconds, rinse it in fresh water, and inspect it carefully under white light. If the density and contrast of the image look correct under white light, make your first "straight print." Place the sheet of printing paper, emulsion-side down, over the negative in the printing position by aligning the paper edges with the paper stops on the mask (if a mask is used). Hold the paper in the printing position with one hand to keep it from slipping out of place when the platen first presses against the edge of the paper, and start the printing cycle as described before. After the printing cycle is completed, remove the paper for processing. Any number of duplicate prints can be made by repeating the printing cycle. Drop the print, emulsion-side down, into the developer. Immerse it immediately with a quick sliding motion while pushing it under the surface of the solution. Grasp one edge of the print, lift it up, and turn it over. Replace the print, emulsion up, on the surface of
Figure 11-31. - A processed test strip. the solution; push it under the surface again and leave it under during the remaining time in the developing tray. The print must be immersed rapidly and evenly to prevent the formation of air bubbles on the emulsion surface. Be sure that all the emulsion gets wet with developer in the shortest time. Agitate constantly for the remaining developing time. Each type of printing paper has its own working characteristic, differing mainly in the length of time required to develop the image in a given type and strength of developer. A correct print is one that develops to the proper density and contrast in the recommended time. When the print is fully developed, lift it out of the developer, drain it momentarily, and place it in the stop bath. After about five seconds in the stop bath, lift the print, drain it briefly, and place it in the fixing bath. Agitate it in the fixing bath for a few seconds and examine it for any defects that might cause it to be discarded. When the inspection is completed, place it, emulsion down, in the fixer and complete the fixing process. Use the manufacturer's recommended fixing time. Some papers have a tendency to float in the fixing bath, especially if the bath is mixed a little stronger than usual. When prints float in the fixer, they should be handled constantly, or turned facedown to prevent the emulsion from being exposed to the air. The parts of a print exposed to the air during fixing may become stained. CAUTION Never attempt to work backwards through the sink-line process. A few drops of fixer on your hands or from a print will contaminate the developer. |
 
|
|
|
||