
TM 9-2330-227-14&P
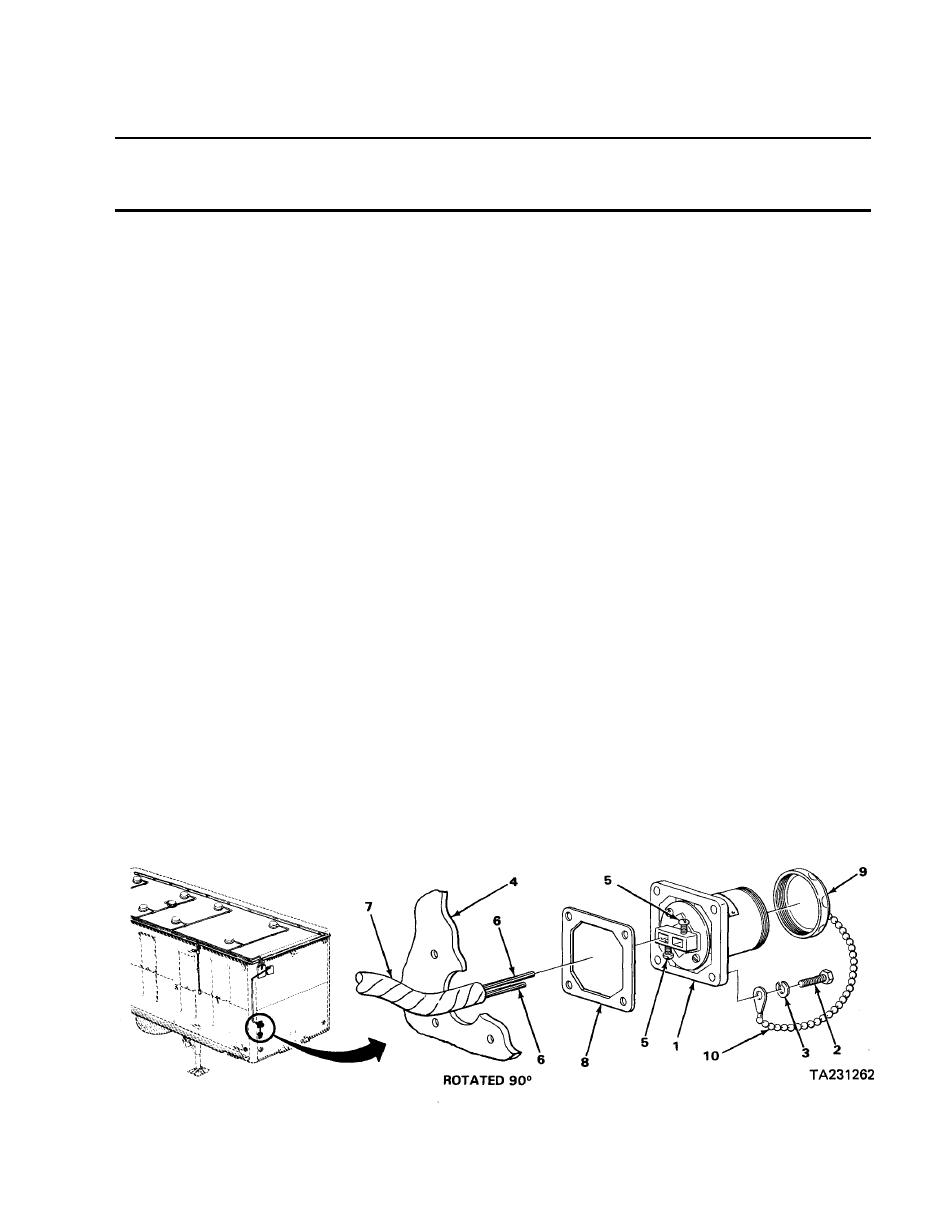
CONNECTOR RECEPTACLE, 110-VOLT - CONTINUED
ACTION
LOCATION
ITEM
REMARKS
REMOVAL - CONTINUED
Take off.
Gasket (8)
5. Connector
receptacle (1)
Cover (9) with
Unscrew, and take off.
6.
chain (10)
INSTALLATION
Screw in until tight.
7.
Cover (9) with
chain (10)
Put in place.
Gasket (8)
8.
Put in proper place.
Two wires (6)
9. Connector
receptacle (1) and
wire harness (7)
Two screws (5)
Screw in, and tighten using 3/16-inch
10.
flat-tip screwdriver.
Put in place.
Connector
11. Outside front
receptacle (1)
wall (4)
Three Iockwashers
Screw in, and tighten using 1/2-inch soc-
12. Connector
(3) and screws (2)
ket and ratchet handle with 1/2-inch drive
receptacle (1)
leaving lower left hole open.
Remaining Iockwasher
a. Put chain (10) end on remaining
13.
screw (2).
(3) and screw (2)
b. Put Iockwasher (3) on screw (2).
c. Screw in, and tighten using 1/2-inch
socket and ratchet handle with 1/2-
inch drive.
4-77

