|
||
|
|
||
| |||||||||||||||
|
|
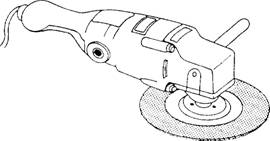
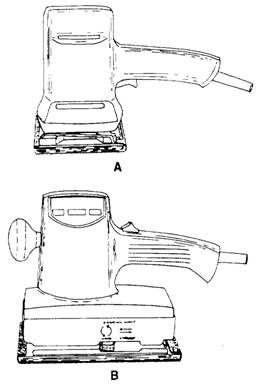
Portable Power Drills Portable power drills have generally replaced hand tools for drilling holes because they are faster and more accurate. With variable-speed controls and special clutch-drive chucks, they can also be used as electric screwdrivers. More specialized power-driven screwdrivers are also available; these have greatly increased the efficiency of many fastening operations in construction work. The two basic designs for portable electric drills (figure 3-24) are the spade design for heavy-duty construction (view A) and the pistol-grip design for lighter work (view B). Sizes of power drills are based on the diameter of the largest drill shank that will fit into the chuck of the drill. The right-angle drill is a specialty drill used in plumbing and electrical work. It allows you to drill holes at a right angle to the drill body. Observe the following safety precautions when operating a portable drill: Make sure that the drill or bit is securely mounted in the chuck. Hold the drill firmly as prescribed by the manufacturer of the drill. When feeding the drill into the material, vary the pressure you apply to accommodate the different kinds of stock. Be careful not to bind the drill or bit. When drilling a deep hole, withdraw the drill several times to clean the drill bit. Portable Sanders There are three types of portable sanders: belt, disk, and finish sanders. When using a belt sander (figure 3-25), be careful not to gouge the wood. The size of a belt sander is usually identified by the width of its sanding belt. Belt widths on heavier duty
Figure 3-25.-Belt sander.
Figure 3-26.-Portable disk sander. models are usually 3 or 4 inches. Depending on the make and model, belt lengths vary from 21 to 27 inches. Different grades of-abrasives are available. The disk sander (figure 3-26) is a useful tool for removing old finish, paint, and varnish from siding, wood flooring, and concrete. For best results with a disk sander, tip the machine lightly with just enough pressure to bend the disk. Use a long, sweeping motion, back and forth, advancing along the surface. When using a disk sander, always operate it with both hands.
Figure 3-27.-Two types of finish sanders: orbital (view A) and oscillating (view B). The finish sander (figure 3-27) is used for light and fine sanding. Two kinds of finish sanders are available. One operates with an orbital (circular) motion (view A), and the other has an oscillating (back and forth) movement (view B). Finish sanders use regular abrasive paper (sandpaper) cut to size from full sheets. Observe the following safety tips when operating portable sanders: Make sure the sander is off before plugging it in. Make sure that you use two hands if using the belt sander. Don't press down on the sander. The weight of the sander is enough to sand the material. Make sure the sander is disconnected when changing sandpaper. Keep the electrical cord away from the area being sanded. Power Nailers and Staplers There is a wide variety of power nailers and staplers available. A typical example of each is shown in figure 3-28. A heavy-duty nailer is used for
Figure 3-28: Heavyduty pneumatic nailer (view A) and pneumatic stapler (view B). framing or sheathing work; finish nailers are used for paneling or trimming. There is also a wide variety of staplers that you can use for jobs, such as fastening sheeting, decking, or roofing. These tools are often driven by compressed air. The amount of pneumatic, or air, pressure required to operate the tool depends on the size of the tool and the type of operation you are performing. Check the manufacturer's manual for the proper air pressure to operate the tool. The power nailer and power stapler are great timesaving tools, but they are also very dangerous tools. Observe the following safety precautions when using them: Use the correct air pressure for the particular tool and job. Use the right nailer or stapler for the job and also the correct nails and staples. Keep the nose of the tool pointed away from your body. When you are not using a nailer or stapler or if you are loading one, disconnect the air supply. |
|
Privacy Statement - Press Release - Copyright Information. - Contact Us - Support Integrated Publishing |